Large cleanup projects rarely stay small for long. You may begin by clearing an old garage, removing materials from a renovation, or preparing a property for its next use. Then the boxes multiply, broken fixtures come out of hiding, and the pile of debris seems to grow every hour.
That’s normal. Big projects create big messes.
What matters is having a sensible plan for handling everything once it leaves the building. A well-chosen dumpster can give workers a central place for debris, reduce unnecessary hauling trips, and keep the property safer while the work continues. But choosing a container isn’t only about finding something that looks large enough. Material type, weight, project duration, placement, and disposal requirements all deserve attention.
A few decisions made before the cleanup begins can save a lot of frustration later.
Understand the Scale of the Job
Start by looking at what you’re actually removing.
A property cleanout may involve furniture, old appliances, boxes, household items, and general junk. Renovation work can produce drywall, cabinets, flooring, insulation, wood, and packaging. Demolition projects can generate an even heavier mix of materials.
Try to estimate the volume as realistically as possible. People often underestimate how much space bulky debris occupies because individual items don’t look particularly large while they’re still in the building.
If a contractor is involved, ask for their recommendation. Someone who regularly handles renovations or demolition will usually have a better sense of how quickly a container can fill.
When a 40-Yard Dumpster Makes Sense
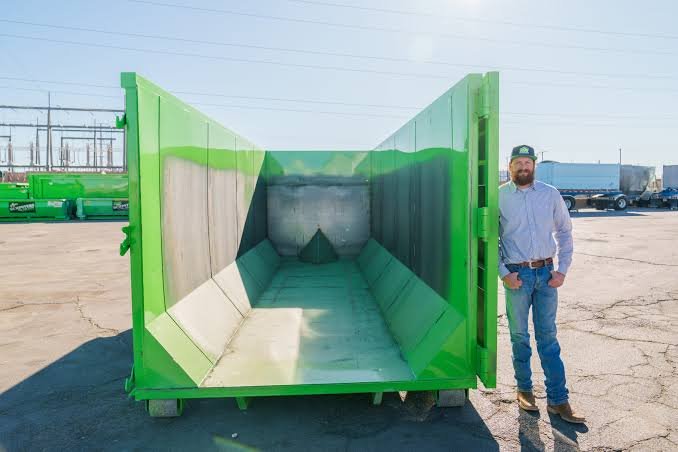
For particularly large projects, a 40 yard dumpster can provide substantial capacity and reduce the need for frequent exchanges.
This type of container may be worth considering for major renovations, large-scale construction, commercial cleanouts, demolition work, or property projects generating considerable amounts of debris.
More capacity can be helpful because workers don’t have to constantly stop and wait for another container. At the same time, bigger isn’t automatically better. A 40-yard container still has weight limits, and dense materials can reach those limits long before the container looks full.
If you’re dealing with concrete, brick, dirt, or heavy roofing debris, discuss the material with the provider before choosing a container based purely on volume.
Weight Can Be More Important Than Space
It’s easy to look at an empty dumpster and think, “There is plenty of room.”
That doesn’t necessarily mean there’s plenty of weight capacity.
Concrete and masonry are obvious examples. A relatively small amount can become extremely heavy. Soil, tile, brick, and certain demolition materials can create similar problems.
Before loading heavy debris, find out what the provider allows. Some materials may require special arrangements or different hauling methods.
Understanding the weight restrictions is not just about avoiding additional charges. It can also help prevent unsafe loading and transportation problems.
Think About Waste Disposal From the Start
The way debris is handled after collection matters, too. Waste disposal isn’t simply a matter of moving unwanted material from one property to another.
Different materials may be processed, recycled, reused, or sent to specialized facilities depending on their characteristics and local requirements. Cardboard, metals, concrete, and certain other materials may have recycling opportunities, while hazardous substances require more careful handling.
Before the project begins, ask what materials are accepted in the container and which ones need to be separated.
Never assume that something is acceptable simply because it fits inside. Paints, chemicals, batteries, tires, electronics, and other restricted materials may have separate disposal requirements.
Keep the Container in the Right Place
Location can make or break a dumpster arrangement.
The container needs to be accessible to the delivery truck and positioned somewhere workers can use safely. Before delivery, look for overhead branches, power lines, narrow driveways, gates, soft ground, and other potential obstacles.
For commercial properties, consider traffic and pedestrian movement. A dumpster placed directly in front of a busy entrance may technically fit but create an entirely new problem.
On a construction site, keeping the container close to the work area can reduce the amount of time workers spend carrying debris. Just make sure the location doesn’t interfere with machinery, emergency routes, or other site operations.
Plan the Loading Process
Once the dumpster arrives, loading it efficiently can make a real difference.
Break down bulky materials where practical. Flatten cardboard, dismantle furniture when appropriate, and distribute debris instead of piling everything into one area.
Heavy materials should be loaded carefully and according to the provider’s requirements. Don’t overload the container or allow debris to extend above the permitted fill line.
If several workers are involved, make sure everyone understands the basic loading rules. A few clear instructions can prevent confusion and keep the site moving.
And don’t climb into the dumpster to rearrange material. If something isn’t fitting safely, stop and find a better approach.
A Construction Cleanout Needs Extra Coordination
A construction cleanout is different from an ordinary household cleanup because the waste can be heavier, more varied, and produced much faster.
Contractors may be removing drywall in one area while another crew handles flooring, cabinets, framing materials, or roofing. Without a clear disposal plan, debris can quickly spread across the site.
Scheduling dumpster delivery around the construction timeline helps. You want the container available when demolition starts, but you also want pickups coordinated so that full containers don’t interrupt the next phase of work.
Communication between the contractor, property owner, and waste provider is particularly useful on larger jobs.
Don’t Ignore the Project Timeline
Cleanup schedules can change.
A demolition project may uncover unexpected materials. A renovation may take longer because of an inspection or delayed delivery. Weather can slow outdoor work.
Before renting, ask how long the container can remain on-site and what options exist if the project runs beyond the original rental period.
It’s much easier to plan for a possible extension before the container arrives than to scramble for another arrangement at the last minute.
Look Beyond the Advertised Price
Price is naturally important, but the lowest advertised rate doesn’t always represent the lowest overall cost.
Ask what the rental includes. Find out about delivery, pickup, rental duration, weight limits, disposal charges, and possible fees for additional days or excess weight.
If you provide an accurate description of the project, the provider can give you a more useful estimate. Don’t be afraid to ask questions. A trustworthy company should be able to explain its pricing without making things unnecessarily confusing.
Sometimes paying slightly more for the right size and service can save money by preventing additional pickups.
Keep Safety in Mind
Large cleanup projects create genuine hazards.
Broken glass, exposed nails, sharp metal, unstable debris, and heavy materials can all cause injuries. Workers should use appropriate protective equipment and avoid lifting items that are too heavy for one person.
Keep walkways clear and don’t allow debris to accumulate around the outside of the container.
If children, customers, residents, or visitors have access to the property, take extra care to separate the work area from normal traffic.
A clean site isn’t just nicer to look at. It’s safer.
Don’t Forget About Reuse and Recycling
Not everything removed during a cleanup has to become trash.
Old cabinets may have another use. Furniture can sometimes be donated. Scrap metal may have recycling value. Clean cardboard and other materials may also be recyclable.
Of course, the options depend on the project and local facilities. Still, taking a moment to sort reusable or recyclable items before disposal can reduce the amount of material sent to a landfill.
It can also make the cleanup feel a little more purposeful. You’re not just throwing everything away; you’re deciding what deserves another use and what genuinely needs to go.
A Better Cleanup Starts Before the First Load
The easiest way to manage a large cleanup is to plan for the mess before it arrives.
Estimate the debris, consider its weight, choose a suitable container, check disposal restrictions, arrange a practical placement area, and understand the rental terms.
None of these steps is especially complicated. Together, though, they can make a major difference.
A large project will probably still be dusty, noisy, and occasionally frustrating. That’s just part of the process. But waste doesn’t have to add unnecessary chaos.
When debris has somewhere to go from the beginning, the property stays more organized, workers can move more efficiently, and the final cleanup becomes much less overwhelming. In the end, the goal isn’t simply to fill a dumpster. It’s to create a smoother path from a messy starting point to a clean, usable space again.